Show what you're working on, get feedback and help
-
pbmax
- Posts: 13
- Joined: Wed Mar 03, 2010 11:00 pm
- Location: Green Bay, WI
Post
by pbmax » Sat Mar 06, 2010 1:16 am
thanks for tips oli.
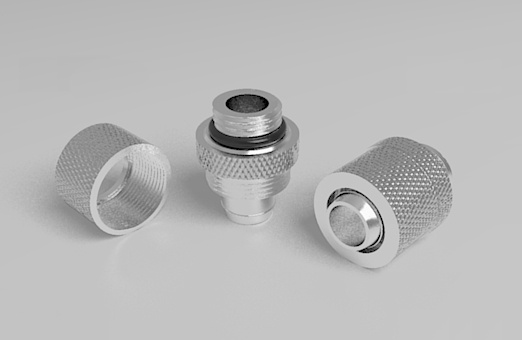
I'll try using a HDR image next. In the meantime, I set up a quick studio. Its a large box with white walls and one rectangle light emitter. Works pretty well but it seems to take longer to render...
Here a compression tube fitting using my "studio". I used the medium photonmap setting.
Last edited by
pbmax on Sat Mar 06, 2010 2:23 am, edited 2 times in total.
-
Fletch
- Posts: 12906
- Joined: Fri Mar 20, 2009 2:41 pm
- OS: PC 64bit
- SketchUp: 2016-2023
-
Contact:
Post
by Fletch » Sat Mar 06, 2010 1:40 am
looks great!
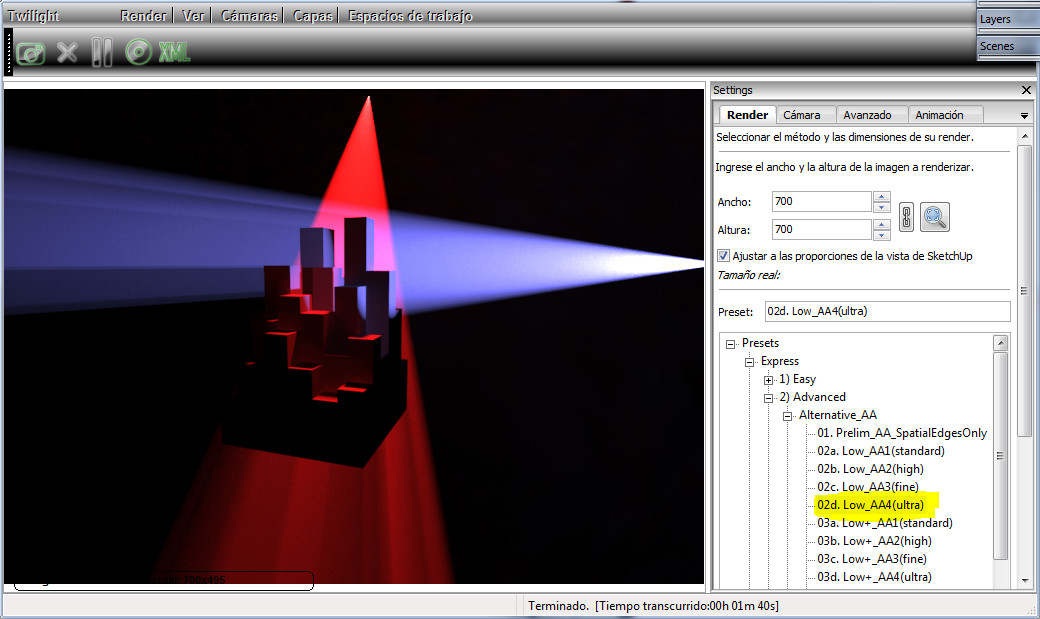
you might like to try one of the Medium+AA(high) settings from the Alternate AA settings for this detailed shot.
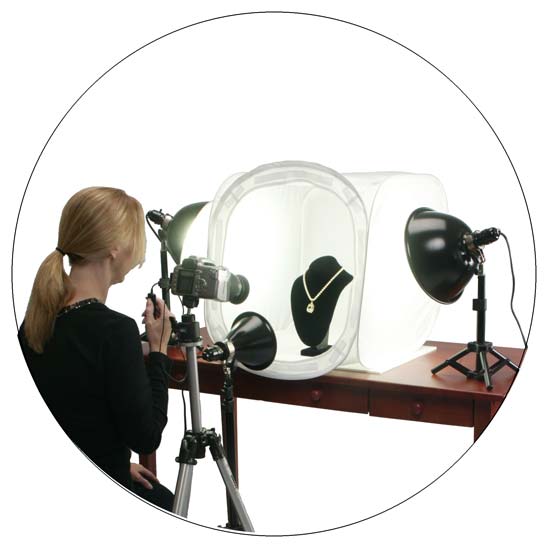
The HDR library I linked you to before has some GREAT Light Tent HDR (light tent = a perfect lighting studio for a product shot exactly like you are doing.)
example... from real life
You
might find the
Jewelry and Product Shots - the Right Light thread very ... umm... enlightening.

-
pbmax
- Posts: 13
- Joined: Wed Mar 03, 2010 11:00 pm
- Location: Green Bay, WI
Post
by pbmax » Mon Mar 08, 2010 9:11 pm
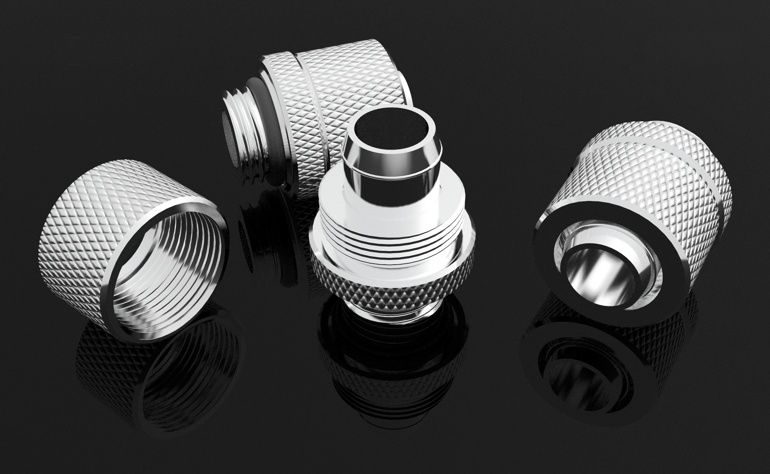
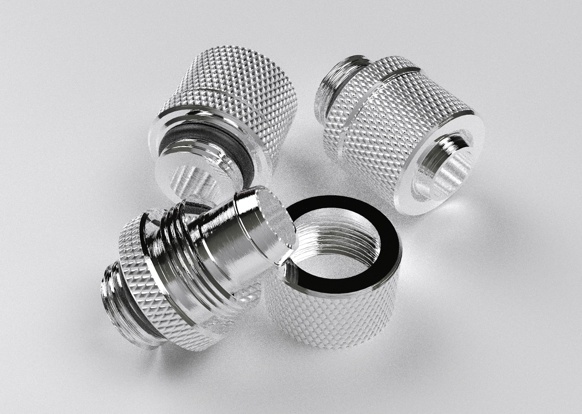
this is with Rayman's HDR light tent & about a hundred MLT passes.
the bump map came out great, but the metal is a little off. it should have a more polished mirror look to it.
comments welcome !
-
Ecuadorian
- Posts: 1779
- Joined: Fri Mar 20, 2009 3:43 pm
- OS: Windows 7 Pro 64-bit
- SketchUp: 7.1
- Location: Guayaquil, Ecuador
-
Contact:
Post
by Ecuadorian » Mon Mar 08, 2010 11:05 pm
With "more polished" do you mean "more mirror-like"?
I think it's already polished enough.
-
Fletch
- Posts: 12906
- Joined: Fri Mar 20, 2009 2:41 pm
- OS: PC 64bit
- SketchUp: 2016-2023
-
Contact:
Post
by Fletch » Mon Mar 08, 2010 11:07 pm
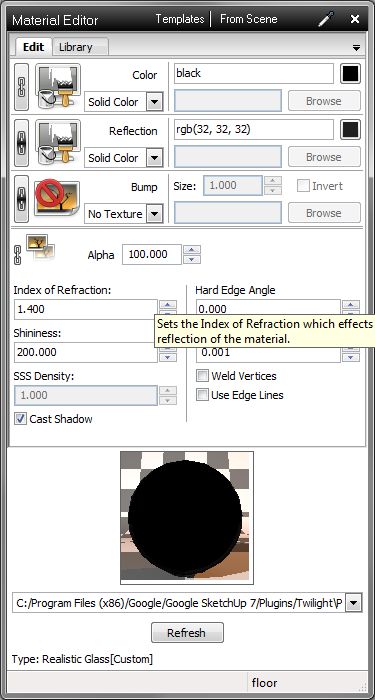
wow! please share screen shot of material settings for the black reflective material for others to use

what do you think of the HDR lighting now?
-
olishea
- Posts: 768
- Joined: Mon Sep 21, 2009 8:54 am
Post
by olishea » Tue Mar 09, 2010 8:15 pm
try reducing metal reflection and add a subtle scratchmap in the bump channel (fletch posted one on this forum). you can use the UV tools plugin to cylindircally map the scratchmap around the surface. why not try using interior or interior+ settings....work very nicely.
Oli
-
pbmax
- Posts: 13
- Joined: Wed Mar 03, 2010 11:00 pm
- Location: Green Bay, WI
Post
by pbmax » Tue Mar 16, 2010 8:01 pm
Fletch wrote:wow! please share screen shot of material settings for the black reflective material for others to use
what do you think of the HDR lighting now?
Yeah, HDR lighting is great for these product shots.
Here's reflective material...
-
pbmax
- Posts: 13
- Joined: Wed Mar 03, 2010 11:00 pm
- Location: Green Bay, WI
Post
by pbmax » Tue Mar 16, 2010 8:07 pm
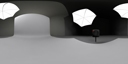
OK, here's just one more render of the compression tube fittings. The fittings are actually using the perfect mirror material with some fine bump maps to show the machining groves.
Also using this HDR by "zbyg":
-
ruBBer
- Posts: 4
- Joined: Wed Sep 30, 2009 10:24 am
Post
by ruBBer » Mon Apr 19, 2010 6:37 pm
how did you make the great surface of the tube fittings and the threads?

-
Fletch
- Posts: 12906
- Joined: Fri Mar 20, 2009 2:41 pm
- OS: PC 64bit
- SketchUp: 2016-2023
-
Contact:
Post
by Fletch » Tue Apr 20, 2010 6:41 am
I think he used the mirror template
Who is online
Users browsing this forum: Ahrefs [Bot] and 36 guests