
Download
Twilight support edited scene here.
render with easy 09 + Fastforward denoise addon for Twilight. This render was done in 3 minutes.
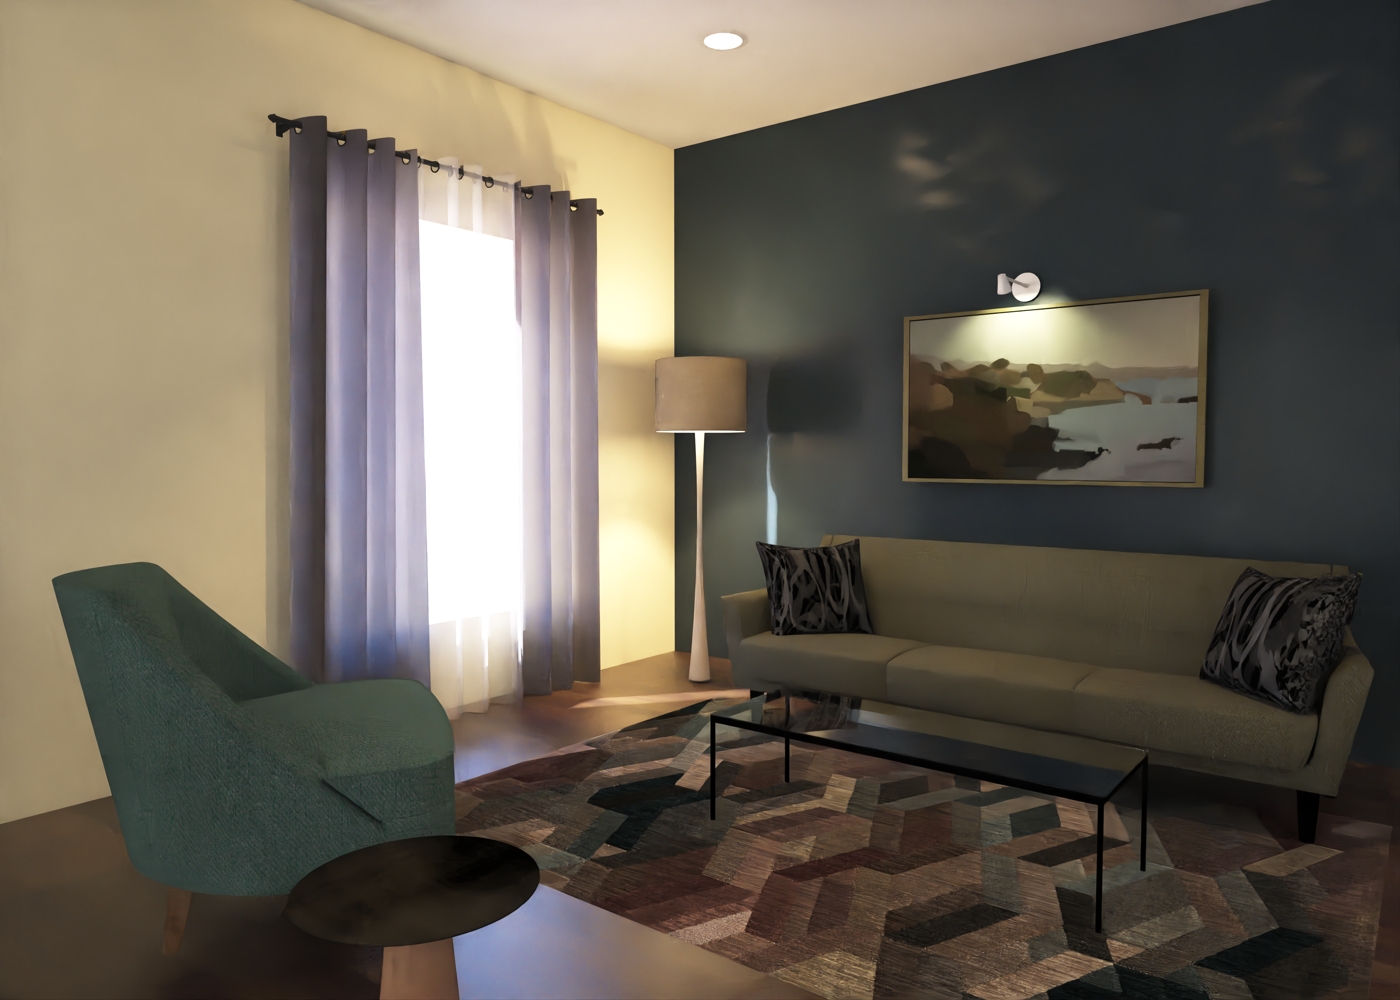
- temp3-techsupport01.jpg (582.62 KiB) Viewed 2906 times
Your lights are strange. The lights are all grouped together. Then the ceiling is in a completely different group by itself. This means that the ceiling plane is cutting through the middle of the light fixtures. This problem is demonstrated along with the solution in the video tutorial linked above. They must be together in the same group, or in no group at all... but in the scene together without being grouped.
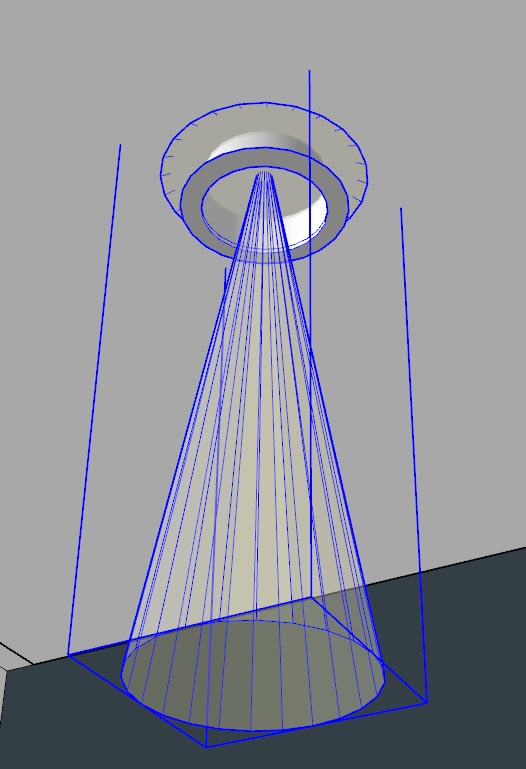
- problem-1.jpg (57.19 KiB) Viewed 2914 times
Open the ceiling group and insert the lights from the components window again so that they can cut the opening.
Or
Cut holes in the ceiling and delete that circle part out that is blocking the light object from shining into the space. (this is the option I chose. I intersected the ceiling plane with the model and deleted the circles that were cut by sketchup.
Suggestion 2:
the radius of the light. This is discussed in the video tutorial. The radius of the light is best kept at 2 cm or 1" when starting out. The radius of your light objects is 5" which is a 10" or 25cm diameter light object so that now the light object is large than the light fixture itself. This results in errors. try .5" (1cm) radius they also render faster that way.
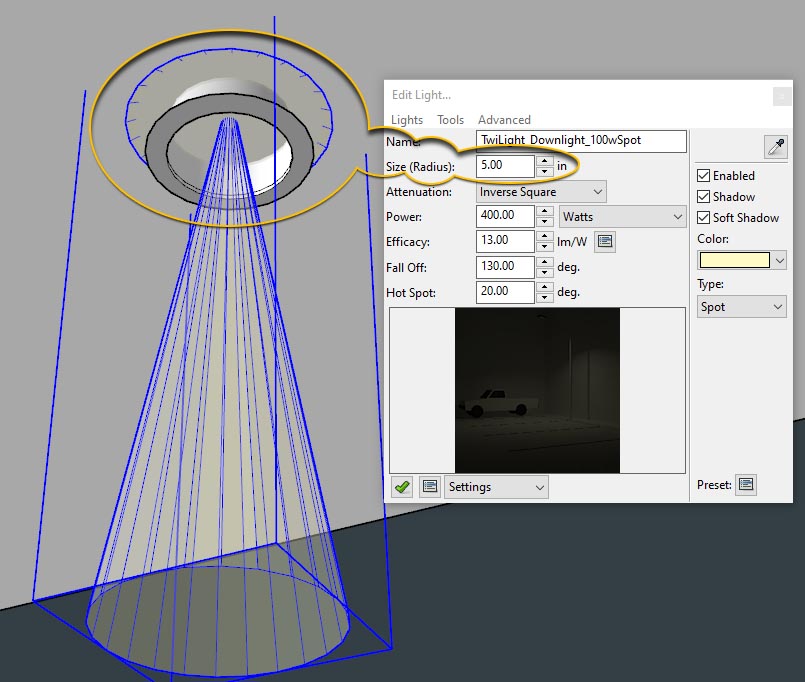
- problem-2.jpg (91.87 KiB) Viewed 2914 times
Suggestion 3:
Your light power for the ceiling cans is 400w which is way too strong. 100w is plenty.
Suggestion 4:
Curtain material is a flat default material. Use Template>Translucent>Thin Curtain and for the darker curtain try "thick curtain".
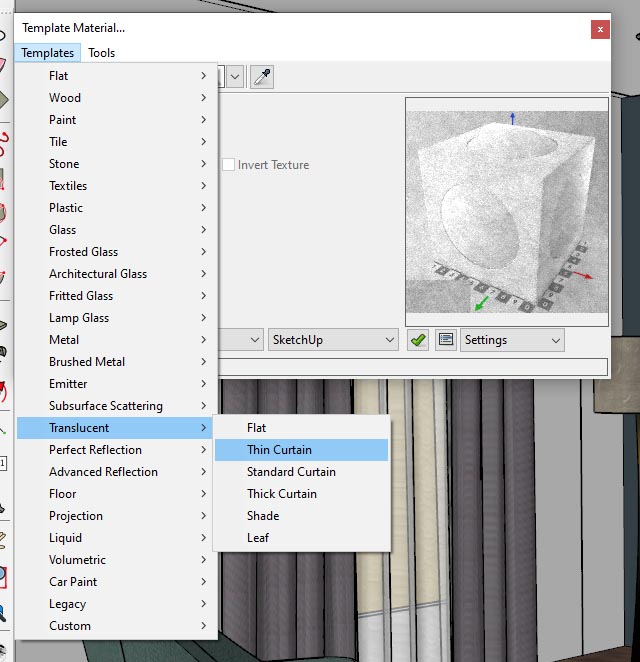
- problem-4.jpg (83.08 KiB) Viewed 2913 times
Suggestion 5: paint on wall try Template>Paint>Eggshell
Suggestion 6: other materials
1 glass table try Template>Arch Glass>Common and set color to pure white
2 set ceiling color to 70 or 75% white
3 paint wall behind curtain to be a light beige or 70% white.
4 Lampshade try Template>Translucent>Shade
5 wood floor try Template>Advanced Reflection > wood mapped set reflection to 50% grey and bump to SketchUp bump size set to 0.1
Suggestion 7 Sky Portal built incorrectly.
The face to be painted can only be the front face of the box you built to cover the window. The face must be flipped around (reversed) so that the side painted is facing into the space. See updated file.
Suggestion 8
avoid floating spots or pointlights in spaces. Only put lights where they would normally go in the scene.
Suggestion 9 bring back and side walls closer to the scene so that they can reflect more light sideways onto the objects. Or add a couple soft light emitting planes to fill the back and side lights.
Suggestion 10 Use Filmic Exposure set Filmic Whitepoint to 1
Suggestion 11 Set Camera Field of View in SketchUp to 55 instead of 35, it allows you to get closer to the subject and looks better, also allowing you to get the side wall on the right to move closer to the scene to bounce more light.
Suggestion 12 - point light in the floor lamp is conflicting with the 3D pole geometry and therefore not working correctly and throwing errors. move it, and lower the power a little... 75 watts or 100 watts. Set color to HSV 36 36 100 Add a spot as done in the example edited scene linked above.
Suggestion 13 - Add thickness to walls, floor, and ceiling. Avoid any z-fighting (where two surfaces share 3D space with one another)
Suggestion 14 - adjust Filmic exposure as in scene linked above and render with easy 09 - buy Twilight + Fastforward denoise addon for Twilight at 50% off for the next couple days only! Then use Fastforward denoise. This render was done in 3 minutes.
Suggestion 15 - purge the scene to make it a much smaller file use purgeall.rb
