The Twilight Render Team shares tips, ideas, helpful hints, and more on using Twilight Render
-
Fletch
- Posts: 12912
- Joined: Fri Mar 20, 2009 2:41 pm
- OS: PC 64bit
- SketchUp: 2016-2023
-
Contact:
Post
by Fletch » Thu Jan 15, 2015 5:32 pm
Animated GIF files can at last be rendered in SketchUp with Twilight V2 - think flickering fireplace fires, or movies on TVs in your animated fly through.
GIF textures can not be directly placed as a texture in SketchUp so you will need to save a copy of the .gif file in a common image format like .jpg or .png. Then apply this image as a texture in SketchUp.
After this, apply a Twilight Material Template and load the animated .gif texture into the Color slot. Then render the animation using the Animation Render dialog.
Here are the detailed steps:
- Insert a copy of your animated .gif image that has been saved as a .jpg or .png format as a texture in your SU scene, you will likely need to apply a Twilight Template to the texture.
- Change the Color slot in the material from the default "SketchUp" to "Texture"
- Change the "type" of image texture file to search for .gif file types.
- Choose your animated GIF file that matches the .jpg or .png texture file you have inserted into SU's material.
- Set up your animated camera if so desired. For still camera, you will need to duplicate your scene, as scene transition time is what determines the length of your video.
- If you have set up multiple cameras, go to SketchUp pull-down menu "Window>Model Info" and set interval in seconds for your cameras, such as "1" second or "2" second transition.
- Open the Animation Editor/Render Animation Dialog for Twilight Render via the Extensions (Plugins) pull-down menu>TwilightV2>Animation Render
- Choose to Animate All
- Choose your desired render setting - suggested to use the Animation Render Settings folder.
- Set the length for your animation. This will be a function dependent on how many cameras you have and what transition interval you have specified in SU.
Animation length explained: If the transition time is 2s and you have only 2 cameras, the length of the animation will be 2seconds. If you have 4 cameras, this is 3 transitions... so 3x2=6 second animation length.
- Choose a very low resolution for test rendering.
- Choose your framerate - default is 30 frames per second (fps) 5fps is recommended for test rendering. 24fps is movie theater film framerate 30fps is television frame rate.
- The animation will be rendered one frame at a time and saved in the format, and named, and placed in the location you specify under "Base Image Name"
- Hit Play to render the animation.
- After render is complete, open the image sequence in a video editor such as Quick Time Pro on Mac or Windows Live Movie Maker or Virtual Dub for Windows.
- Using the Video Editor > Save the animation as .mpg or .mov or .avi or other video format of your choice.
-
Fletch
- Posts: 12912
- Joined: Fri Mar 20, 2009 2:41 pm
- OS: PC 64bit
- SketchUp: 2016-2023
-
Contact:
Post
by Fletch » Sun Apr 11, 2021 9:57 pm
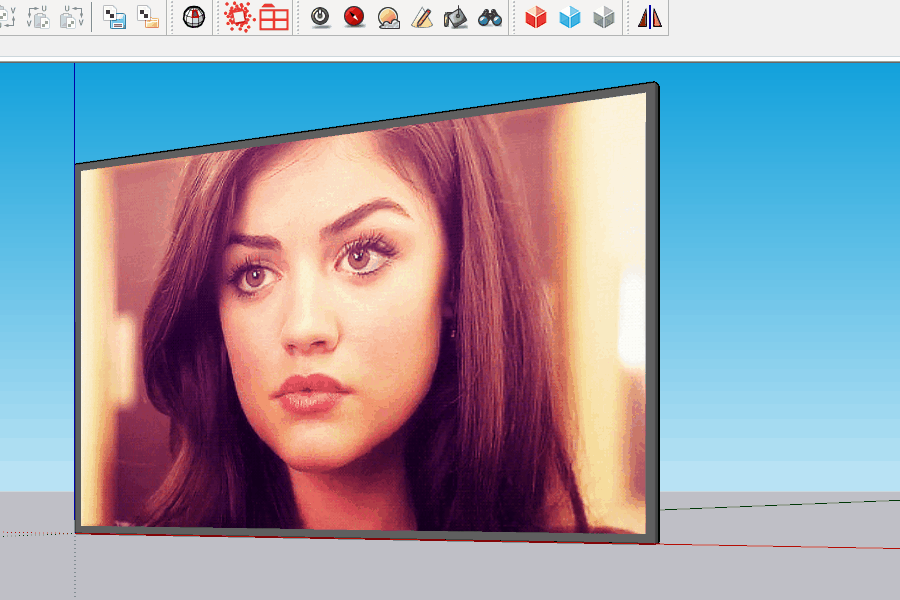
Here's an animated TV scene as an example.
The image on the screen is a placeholder image, as SketchUp cannot read .gif files.
The animated .gif file is in the zip folder. You may need to edit the material in SketchUp with the Twilight Material Editor to point to the .gif file in the proper location on your machine.

NOTE: Requires Twilight Pro
Render with Extensions>Twilight V2>Render Animation
-
Attachments
-
- ANIMATED-TV-Screen.zip
- (2.26 MiB) Downloaded 1151 times
-
- ANIMATED-TV-Screen.skp
- (304.97 KiB) Downloaded 1133 times
-
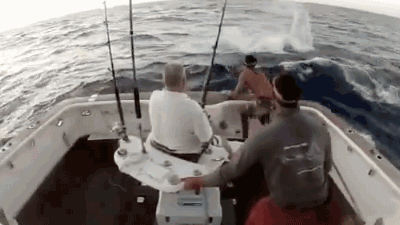
- swordfish-on-board.gif (1.98 MiB) Viewed 23325 times
-
ntxdave
- Posts: 1012
- Joined: Tue Feb 23, 2016 7:05 pm
- OS: Win 10
- SketchUp: 2020Pro
Post
by ntxdave » Wed Dec 08, 2021 9:47 pm
If this is the animation that is supposed to show on theta screen, can you post a render with the tv in a room with the animation playing?
-
Fletch
- Posts: 12912
- Joined: Fri Mar 20, 2009 2:41 pm
- OS: PC 64bit
- SketchUp: 2016-2023
-
Contact:
Post
by Fletch » Thu Dec 09, 2021 11:23 am
Be sure to follow all the steps in the tutorial.
- You have to download the .gif file from the post above.
- You open the SketchUP scene from the post above.
- Use the Twilight Material Eye dropper to sample the TV screen in the skp scene.
- You have to browse to point texture for the material on the TV screen to utilize the .gif file you downloaded.
- It will not automatically find the .gif file.
- Then you must render the animation using the Animation Render Dialog.
-
Attachments
-
- animated-tv.gif (2.89 MiB) Viewed 20463 times
-
Fletch
- Posts: 12912
- Joined: Fri Mar 20, 2009 2:41 pm
- OS: PC 64bit
- SketchUp: 2016-2023
-
Contact:
Post
by Fletch » Thu Dec 09, 2021 11:55 am
See gif as TV screen Video file rendered out here.
zipped .mov file:
.gif screenshot of the rendering:
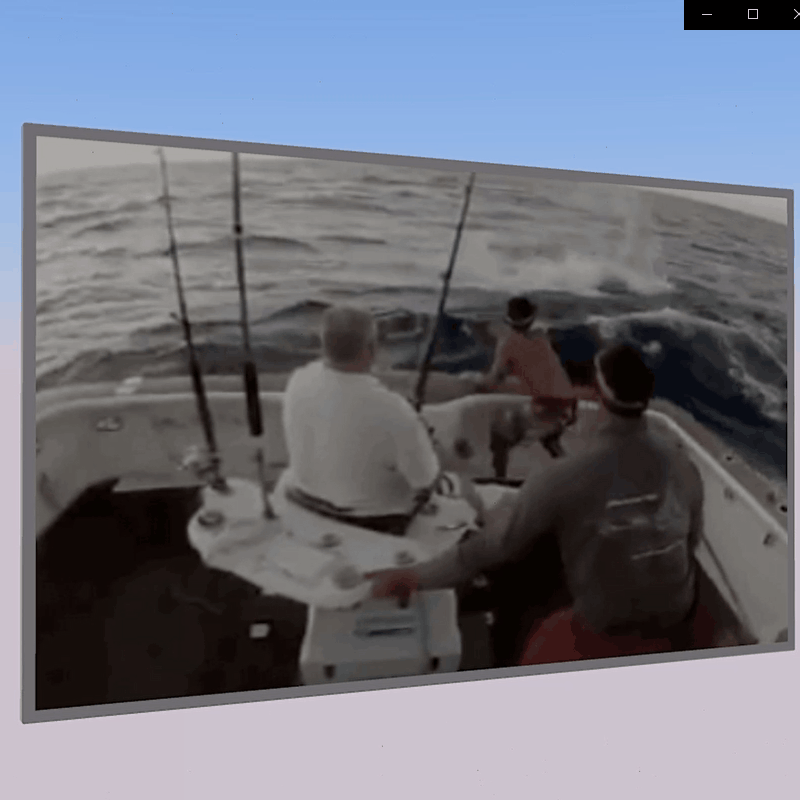
- animated-tv-rendered.gif (8.5 MiB) Viewed 20452 times
-
ntxdave
- Posts: 1012
- Joined: Tue Feb 23, 2016 7:05 pm
- OS: Win 10
- SketchUp: 2020Pro
Post
by ntxdave » Thu Dec 09, 2021 2:55 pm
Thanks for this tutorial Fletch.
Who is online
Users browsing this forum: No registered users and 2 guests