Composite Overlay
Tutorial 6 in the Intermediate Twilight Render V2 Tutorial Series
|
With V2.5, Twilight Render provides the ability of instantly creating non-photorealistic renderings (a.k.a. "NPR" images) by overlaying or compositing the rendered image with the SketchUp view. In this tutorial we will look at how to use this powerful new option that comes with Twilight Render Pro. |
|

Composite Overlay of a rendered image is essentially a 3 step process.
- Enable Composite Overlay within the Advanced Menu of the Render dialog for Twilight Render.
- Set up SketchUp view style before rendering in order to prepare for the overlaying of the two images.
- Render the image, and adjust the overlay method type and the rendered image's exposure to achieve desired results.
Step 1
Enable Composite Overlay within the Advanced Menu of the Render dialog for Twilight Render.

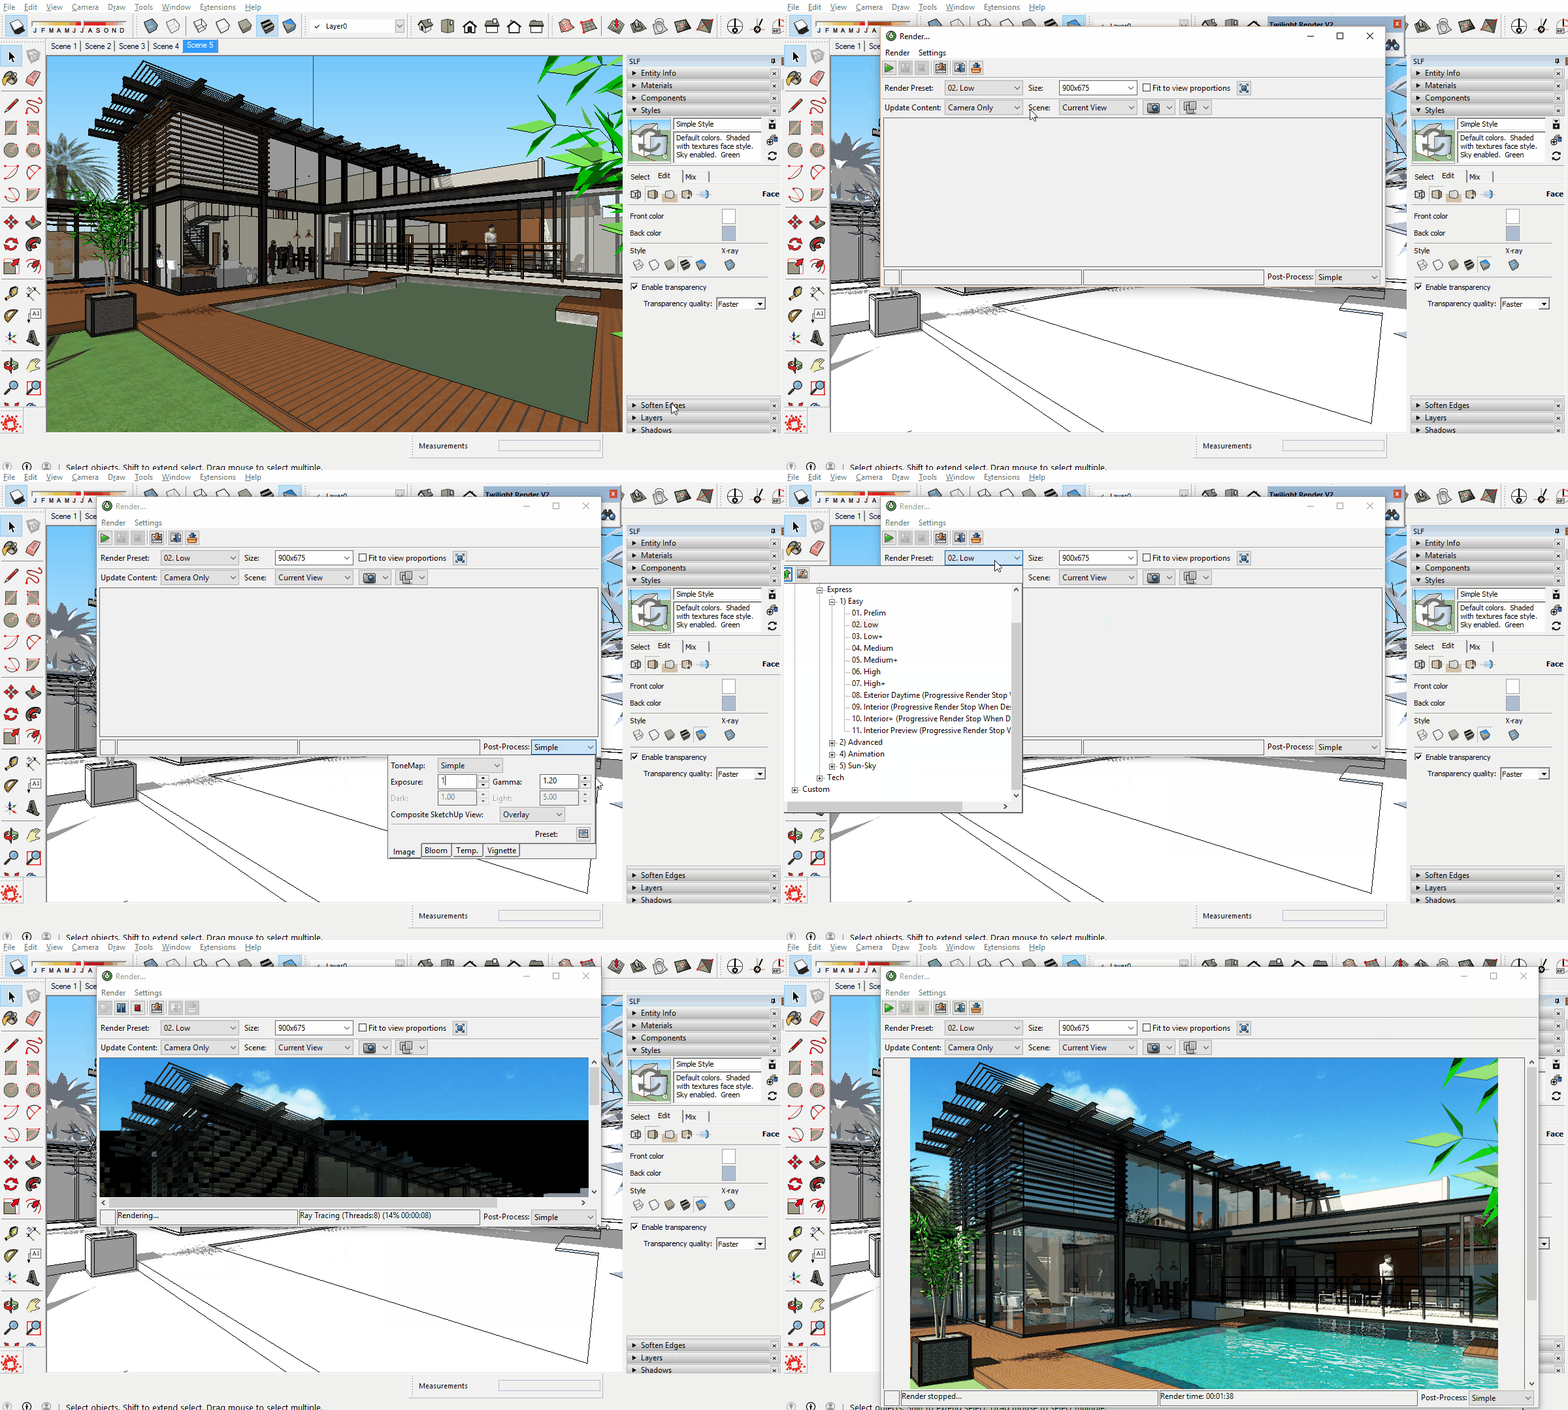
You must enable the export of the SketchUp Scene view on a SketchUp Model-by-Model basis. It will take a little bit of extra time for Twilight to save the matching SU view as well as to start the rendering process each time you want to render your image, so this is a function you must deliberately enable for each of your SketchUp models.
- We recommend using pure white for your Front Face material in SketchUp, and a light blueish-gray for the reverse faces. Be sure your model is showing all front faces. This is so that if you capture the Monochrome SketchUp View instead of the materials view, the Overlay feature results are typically more aesthetically pleasing. Feel free to experiment with other colors for different artistic effects.
- Set view to monochrome (this step is not required, only recommended)
- Open Render Window > Settings Pull-down Menu > Advanced Render Settings > Enable check box for "Capture Screenshot for Overlay" and click "OK".

Step 2
Set up SketchUp view style before rendering in order to prepare for the overlaying of the two images.

- First, verify the view is set to Monochrome (not required, but typically looks best for most of the Overlay modes) This maintains the colors defined in the rendered image. Overlaying the colors of the rendered image with the colors of the SketchUp image will darken or over-saturate most colors.
- Next, verify that the Render Dialog's Tonemapping settings are set to Simple, and Exposure and Gamma are set to 1.0 for each
- Finally, render on any setting you like, Low render settings are sufficient for creating very quick Overlay renderings.

Step 3
Render the image, and adjust the overlay method type and the rendered image's exposure to achieve desired results.

- After the rendering is complete, choose the desired Composite SketchUp View mode, for example "Multiply" mode or "Soft Light" mode.
- Next, adjust Exposure and Gamma to achieve desired Composite view results. The rendered view will update as you adjust. This process is much faster if hardware acceleration is enabled in Twilight Render's Options (Extensions pull-down menu > Twilight Render V2 > Options)
- Finally, save the rendered image.
- TIP 1: Setting your SketchUp View Style to something with Sketchy or "jitter" edges can look very interesting
- TIP 2: Rendering at high resolution can make the SketchUp edge lines appear thinner in the overlay process.

